How to Ferment Your Own Pickles Without Worry
If you’re like me – and I know you are – then you’ve spent a non-zero amount of time during this pandemic feeling like your productivity is falling down the toilet, like the proverbial adage. At the beginning of the quarantine era, I decided to do vegetable fermentation, which I have long been interested in, but previously avoided out of fear that I would screw something up and poison myself.
Studying fermentation seemed like a worthwhile way to harness stale energy, but I’m not a scientist – what right did I have to put food in jars and try to pierce the narrow needle of safety of fermented foods? I read several books and guides and quickly realized what I didn’t like about (many) books and guides: authority . A lot of these books take a stand on certain issues that I don’t think should be so hard, buddy. My experience has shown me that fermentation is not only a science but an art, which is not surprising given that people have used fermentation as a conservation method for millennia. If it were generally unsafe and resulted in massive loss of life, they would probably have given up on it long ago.
If you have similar concerns or concerns about fermenting your own pickles, I’m here to assure you that you are a heck of an adult and can be trusted with the process. Your only role is to create an environment where friendly bacteria can do their real work.
Meet Lactobacillus, You Already Live Together
While fermentation seems like a complex bacterial witchcraft, it’s actually much easier to understand than it is in American football. When we talk about fermenting vegetables in salt, we’re talking about lacto fermentation, named after Lactobacillus, the friendly bacteria that do all the hard work in the jar while you stare a thousand yards on your way through another Zoom meeting. Lactobacillus bacteria are small pigs hungry for sugar in vegetables (and fruits, for that matter), which they convert to lactic acid, a natural preservative. Fermentation keeps your vegetables edible for a long time, creates many new and interesting flavors, and introduces great probiotics into your gut.
Where do lactobacilli come from? Everywhere! Your surroundings are tainted by them. They are present on the vegetables themselves, and probably throughout your kitchen, and even on your hands. Some types of lactobacilli are living inside your body right now. This is why you want to be clean when fermenting, but not too clean, because completely killing bacteria is not a battle you are going to win. Some fermentation guides are obsessed with disinfecting equipment, but I find this kind of stress only exacerbates my already significant anxiety load, and killing all the bacteria on your vegetables will make it much harder to get a good tasting enzyme. (Also, ignore those who instruct you to sterilize anything in your home kitchen; you are not going to do that. Disinfect is good; sterilize is not.)
Only rinse and wipe vegetables under water , wash the jars thoroughly with non-antibacterial soap, and wash your hands frequently. It’s all. You don’t have to wear a protective suit and bleach onions layer by layer to cook dangerous lacto pickles safely.
Let’s salt
Another reason to lower the temperature for any foodborne disease problem is that dipping vegetables in the brine starts a process that kills the harmful disease-causing bacteria in favor of the good lactobacilli that cause the marinade. Bad bacteria hate salt, while lactobacilli hate it. By creating a brine with the correct ratio of salt to water, we create an environment in which bad bacteria cannot grow, but good bacteria can. By the time the good guy’s lactobacilli take over, they are producing enough lactic acid to prevent the villains from invading and capturing.
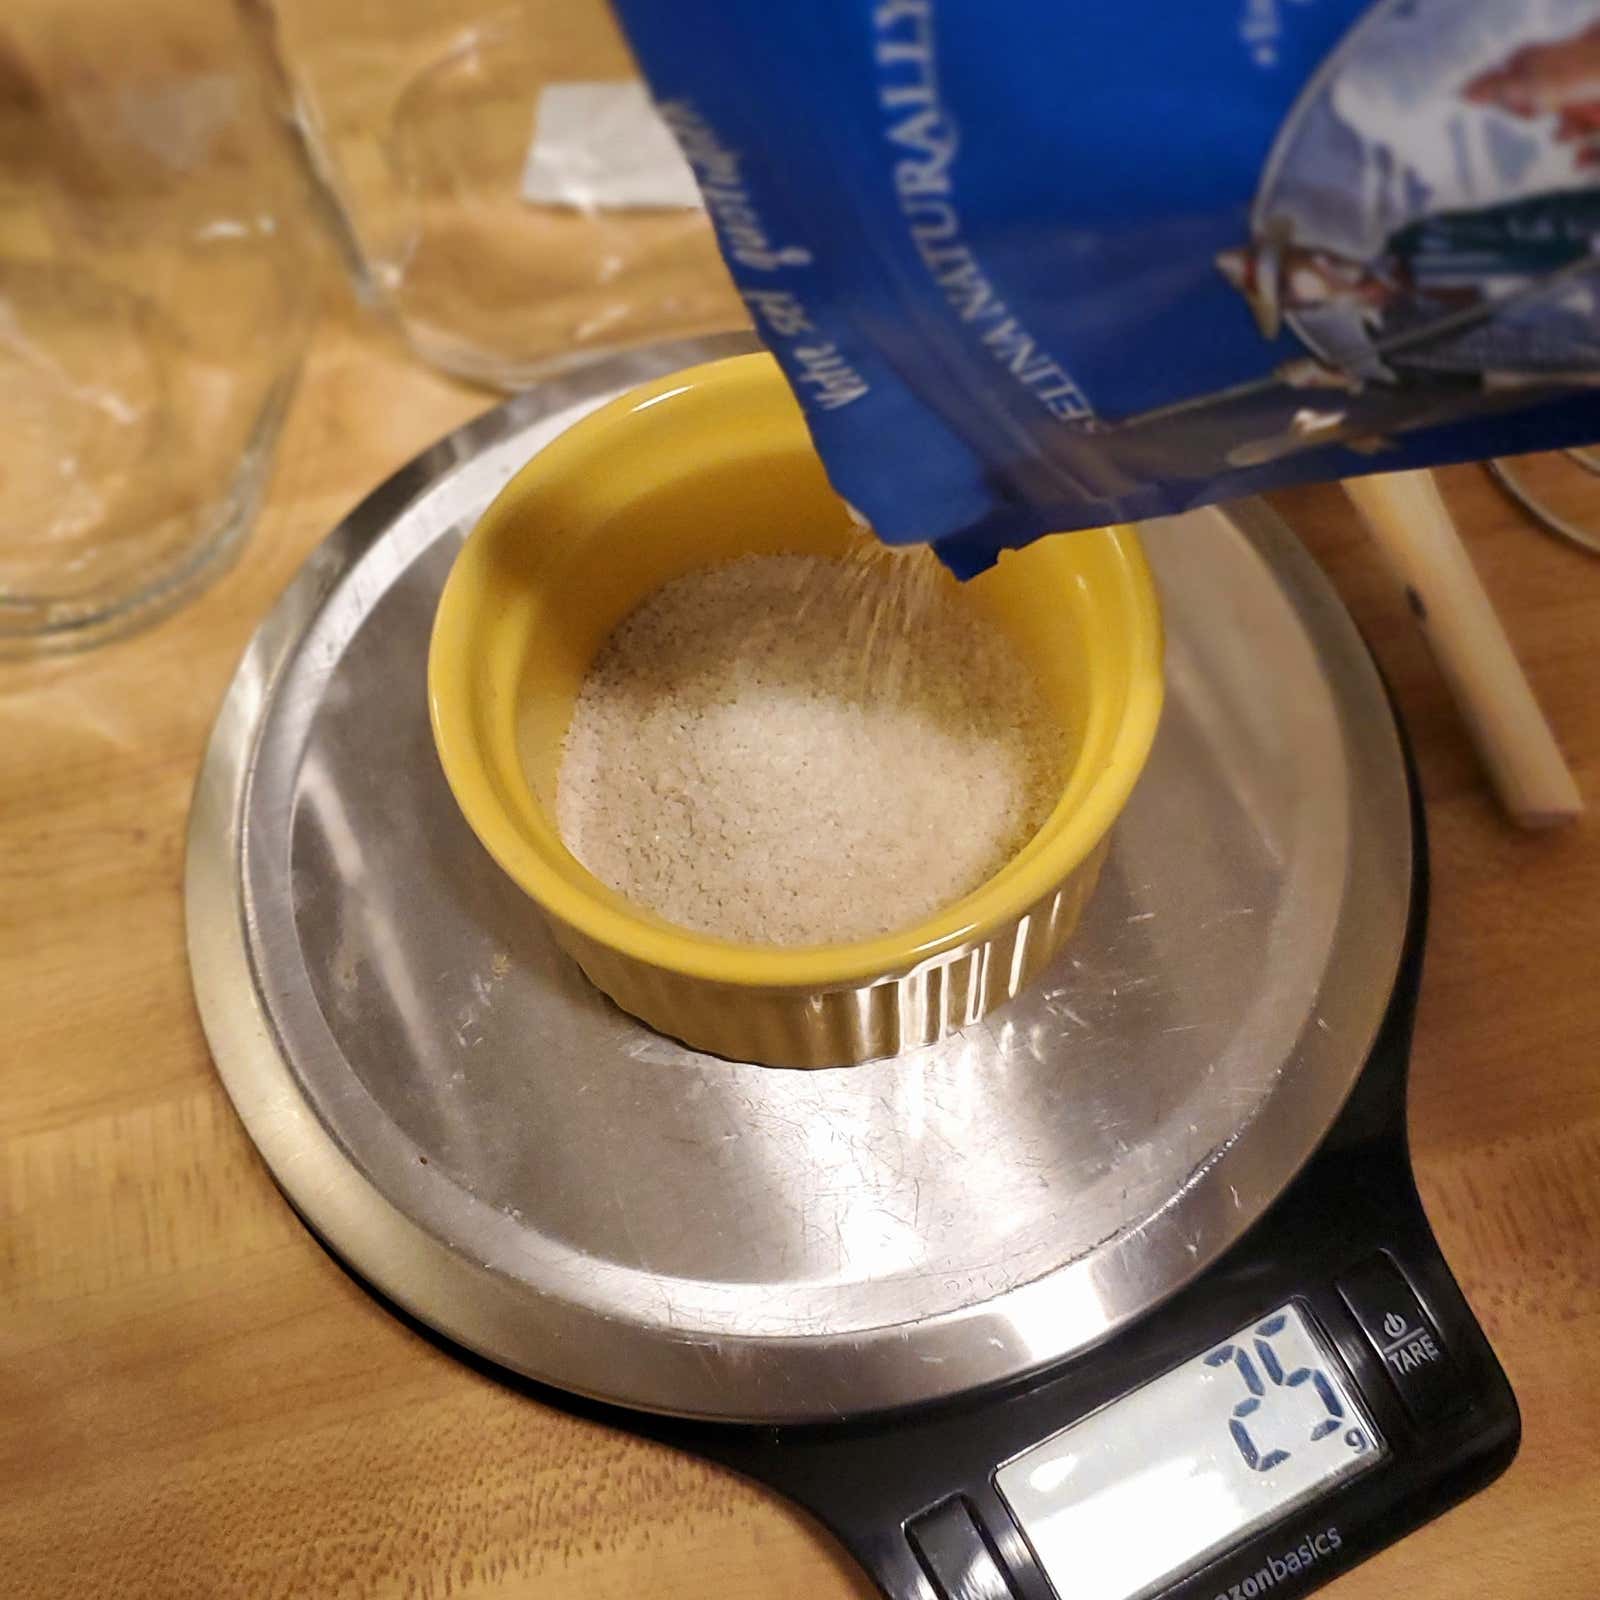
The goal is to create a brine in which the percentage of salt to water matches what you are fermenting. (Note: Some guides will advise you to calculate the percentage of brine not based on the weight of water, but based on the weight of the water and vegetables inside the container you will be using. I have personally found the best results with water. To the percentage of salt, but you can also experiment by placing the jar on a scale, zeroing it, filling the jar with vegetables and water to find out their weight, and then calculate the percentage of salt based on that.)
Since I’m a life-threatening allergy to math, this is my least favorite part of the process, but luckily there are plenty of tools on the internet that make this calculation easy, like this pickle calculator . However, the metric system can help make these numbers easier to understand: if you are making 2% brine from a liter of water and a liter is 1000 grams, then you need 2% of 1000 grams – 20 grams of salt – to hit your target.
You will notice that brine math uses mass, not volume, to measure salt. Salt is a variety of things, and two tablespoons of one type of salt can have a completely different mass than two tablespoons of another. If you don’t know the exact brand of salt used in a recipe, measuring by volume can reduce the percentage of brine, causing the enzyme to malfunction. You can find fermentation recipes that use tablespoons or whatever and you can try them (I did!), But be prepared to experience a lot of frustrating setbacks before you hit on exactly how much of your salt you need to get the right pickle.
The exact percentage of salt you want to add to the brine will depend on what you are trying to ferment. While most vegetables are good for a 2-2.5% brine, some softer vegetables (like cucumbers or peppers) benefit from higher salinity and are better suited for a 5% brine. (Some people will tell you that onions are good at 2%, but I composted a lot of spoiled onions before I discovered that in my particular kitchen microclimate, 5% for onions is key.) There are lists of suggested pickle percentages for different vegetables on the internet. but some of this information will become part of your own discovery process.
This is in part because your unique home universe also affects how your enzymes flow. For example, ambient temperature is very important, as higher temperatures speed up fermentation and lower temperatures slow it down. There are many different types of Lactobacillus bacteria, and there may be more of one type of bacteria in your environment than others, and this type may react slightly differently than a book or guide might suggest. This process is a symbiotic process between you and all these tiny organisms transforming your food; the unforeseen happens – that’s okay, and with every not-so-successful fermentation, you’ll get smarter.
Preparation of the first starter culture
While there are many useful fermentation tools out there, you don’t need that much to get started. Your entry-level tools:
- A food-grade glass jar with a tight-fitting lid (a large tin can work well)
- Kitchen scale ( just buy it , you will use it more often than you think)
- Something that fits in your bank to serve as cargo (more on this below)
For the starter culture itself, you will need:
- Unchlorinated water at room temperature (filtered or completely boiled and cooled water will do).
- Non-iodized salt (sea or kosher salt will work; table salt that is iodized will not work)
- Vegetables (I suggest sticking to just one type of vegetable to start with).
- Condiments if desired (try garlic, spices, herbs, fresh or dried, gochugara, etc.)
- Bay Leaves (Or use another leaf that is high in tannins ; these are optional, but they can really help preserve texture.)
How much brine should you prepare? The volume of your fermentation vessel should be working fine; if i make half a gallon of vegetables i make half a gallon of pickle. This is more brine than I need, but it would be nice to put excess brine in a jar and stash in the refrigerator in case you need to top up enzymes later.
Add salt to room temperature water and stir, stir, stir. Then you prepare the vegetables. You can ferment just about anything. This is not to say that it will definitely taste good, but experimenting is half the fun. Green beans and cucumbers are simple options for beginners. Carrots and cauliflower are also good; just be aware that denser vegetables may require longer fermentation. I personally have never had any luck with radish fermentation.
Smaller chunks with more surface area ferment faster than larger chunks, but they can also lose their texture in the process, so think about that when you cut and dice. I always prefer rinsing carrots than peeling them, but you love. The tips of the flowers must be removed from cucumbers, even if you ferment them whole; at this end is an enzyme that will soften your pickles. You get to know your vegetables well: how they ferment and what are their strengths and weaknesses.
It’s time to pack the jar. You want to seriously cram things in there as tightly as possible, but make sure you leave at least an inch of free space at the top. Sprinkle any seasoning on top of the vegetables, such as garlic or pickling spices, and bay leaf if you are using it. I don’t recommend putting all the spices on top because most of them will float and make a mess. When your jar is loaded, fill it with brine.
Now, a whole team of friendly bacteria are waiting to prepare delicious homemade lacto pickles for you, but they need one more thing to succeed: They need you to keep their vegetables in water at all costs . You can do this with a glass fermentation weight that will fit in a wide-mouth jar or fermentation jig. Or, if you don’t feel like investing in it, you can fill a Ziploc freezer bag with a little extra brine and push it into the top of the jar. (Some fermentation blogs say you can also use your literal boiled rock as a fermentation weight – don’t put the rock in the ferment, folks. Hooray.)
Weight is needed so that not a single piece of vegetables breaks through the surface. Fermentation nerds have a saying like “Brine will be fine” if that helps you understand why it matters. If you’ve used a lot of spices, they may float; it’s not perfect, but it probably won’t ruin your efforts. Just make sure your vegetables are under the brine, as any piece that floats above the surface creates a small raft that non-Lactobacillus invaders can snag on. The most common of these is cam yeast, a physically harmless whitish, powdery, film-like yeast that can affect the flavor of your batch. Some people ditch the leaven right away, which generally develops kachm yeast; others simply scrape the yeast off the surface of the brine and continue to work. Some I collected and others I composted. It’s really a matter of your personal comfort. Mold can also grow if your vegetables are not completely submerged in water, which is a death toll for this particular enzyme.
Once you’ve made sure the vegetables are well filled with water, you’ll need a lid. There are many strong opinions about lids and whether to use an airlock type lid ( example 1 , example 2 ) to allow the carbon dioxide generated during fermentation to escape. I started using airlocks, but these days I use regular storage lids or (more often) a Fido jar with a hinged lid , and I can’t say it made a huge difference to me anyway. Use your instinct to guide this, but if all you have is a regular lid, you should be fine.
Close the jar with a lid of your choice, as usual (excessive twisting is not required), and hide it away from direct sunlight; I keep starter cultures in the refrigerator. I highly recommend placing the jar on top of something to prevent overflow; some put them on baking trays, and I usually put mine in bowls. Depending on how full your jars are, significant overflows can occur, but this is actually a good thing: the less oxygen in your jar, the more likely your fermentation will be successful.
And now your job is done! Fermentation will begin, and your only remaining task is to decide when you want to eat it, when you’re ready. Fermentation times can vary greatly, so check your jar (s) carefully each day to see how they progress. Every time you work with enzymes, do it with freshly washed hands so that you do not accidentally bring new bacteria into the jar. For the first day or so, nothing happens, but pretty soon you will notice changes, from color changes to bubbles appearing as a result of the aforementioned carbon dioxide production. These bubbles are a normal part of the fermentation process, and if you are not using an air-lock lid, you can periodically open the cans to relieve pressure build-up, but limit the opening as much as possible. I have heard many stories about an exploding can, from which cucumbers of death, decorated with shards of glass, were sprayed through an innocent kitchen. Nothing like this has ever happened to me, but you have been warned.
A daily fermentation check will help you know what is normal. Some enzymes may smell a little dubious at first, but don’t be too quick to assume they’ve gone bad – sometimes they just take a little longer to get used to the atmosphere. You will know when something went wrong and the enzyme is really bad. The smell leaves no room for doubt. Don’t try to save something that smells terrible. Likewise, if you have a mold problem, it will be obvious, and if you see anything that looks like mold, especially red or black mold, throw it all away and start over. If the brine evaporates and the vegetables may float to the surface, add some more of the saved brine. (Aren’t you glad you did this?)
Finished fermentation will smell … right. Like fermented vegetables. It will have a sour, sour and salty taste, but a pleasant taste. You probably won’t recoil from the can, unless you hate fermented vegetables, in which case I admire your eagerness to read this far. (If you’re unfamiliar with the aroma and flavor of fermented vegetables, buy and eat them to maintain baseline.) It’s also perfectly normal for sediment to collect at the bottom of the enzyme and the brine looks cloudy as it finishes. I believe that most chopped vegetable fermentations take place in about a week, but again, this will really depend on your situation. If you’re looking to test acidity to see if your brine has reached a safe level (below 4.6, although most lacto pickles tend to “run out” around 3.5-3.0), I’m a big fan of pH strips for your peace of mind. …
Once your fermentation is “ready,” it will not just stop. If you don’t eat pickles quickly, you can move them to the refrigerator to slow down fermentation, but fermentation will continue relentlessly until all consumables are depleted, as happens in the Marvel Universe. However, it will stay in the refrigerator for quite some time if, like me, you find yourself producing more enzymes than you can eat in a reasonable amount of time.