How to Build an Owl’s Nest for Your Backyard (and Why You Should Do It)
If you’re a wildlife lover, it’s always worth inviting a more diverse bird population into your yard. Owls, with their natural pest-control abilities, are often overlooked friends of the garden and are also fun to watch. Providing a safe owl nesting area can help attract owls to your outdoor space, so here’s what you need to know.
Why add an owl’s nest?
Owls can eat up to 12 mice in one night’s hunt, making them a practical and fun addition to the garden. If you have problems with pests eating vegetables or other plants in your yard, owls are a natural option that can help keep your garden safe without the use of traps or poisons.
Place for your owl’s nest
When choosing an owl nest for your yard, keep in mind that some owl species are territorial, especially when they have young, so it is a good idea to keep their nest a safe distance from entrances and walkways. Even less territorial species may perform a dive bomb maneuver if they believe their nest is in danger.
The size of your owl’s nest
To build an owl nest, start by choosing the right size box. If the owls in your area are small, you will need an eight- or 10-inch box, but larger nesting owls may require a box up to 38 inches high. Before choosing a box size, it’s a good idea to check with your local university or Audubon Society for local sizing recommendations.
Gather your tools and materials
For the owl box you will need:
- Some unfinished wood planks such as pine.
- Nail gun , hammer and nails, or drill with pilot drill bit and screwdriver attachment.
- Roulette
- Board saw
- Jigsaw for cutting out the inlet hole
- Ladder
- Box hanging equipment
Entry size
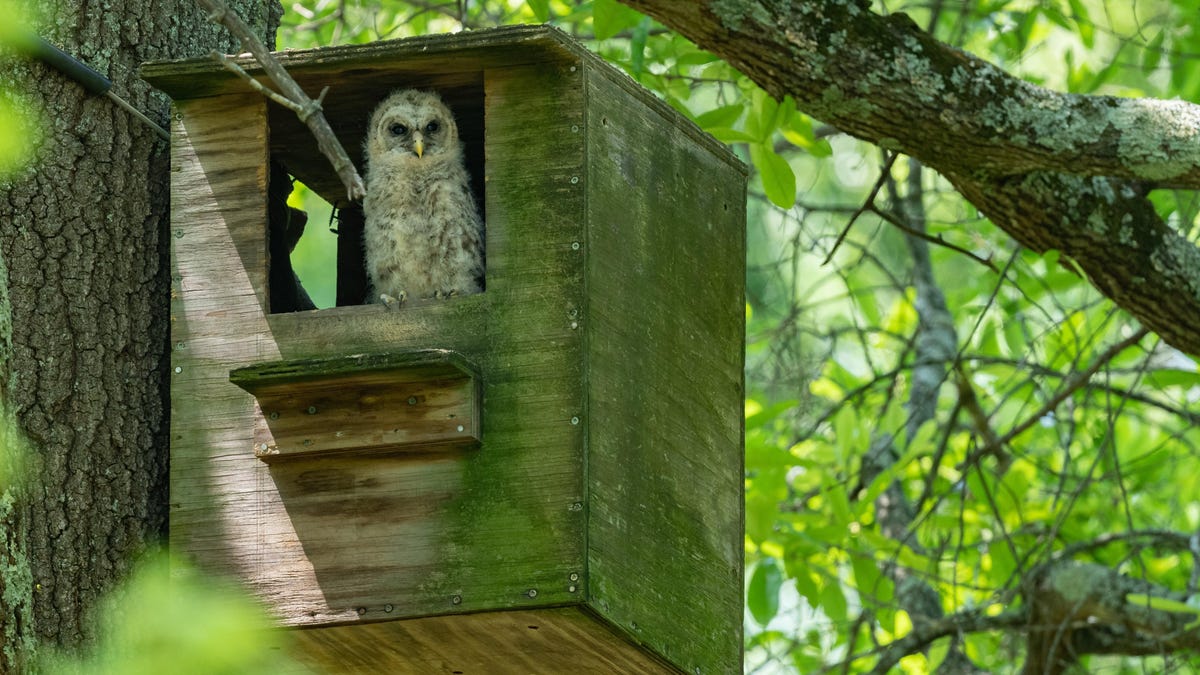
Once you have chosen the height, width and depth of the box, you will also need to create an entrance to the box as you would any birdhouse that will accommodate the largest owl you plan to attract. For larger owls, such as barn owls, the hole should be about seven inches square. Smaller owls may use an opening as small as four inches square.
Dimensions of your owl’s nest
Using a barn owl box as a starting point, I’ll describe how to build the box so you can adjust your dimensions for smaller owl species as needed. The finished box should measure 38 by 18 by 12 inches on the inside with a seven-inch square opening on the front. If you’re skilled, you can make a more fancy-shaped entrance using a jigsaw (there’s no rule against this), but for the sake of simplicity, let’s assume the opening is square.
Cut your pieces
Start by cutting off the largest side, the back panel of the box. For a barn owl, the back panel should measure 38 by 18 inches. You can then cut the two sides to measure 38 by 12 inches plus the thickness of the boards. If your board is half an inch thick, the sides will be 38 inches high and 12 ½ inches wide. This allows the sides to overlap with the back panel. Then cut the top and bottom pieces to measure 13 by 19 inches so that they overlap the sides and the front and back panels. Finally, cut a piece of the front piece that is 38 inches tall and 19 inches wide. On this panel, measure up from the button six inches, then mark a seven-by-seven-inch square in the center at a height of six inches. Use a jigsaw to cut the hole.
Assemble and place the owl’s nest.
Then assemble the parts. In most cases, attaching the box will be easier if you first assemble the back, top, bottom, and sides, place the box on a sturdy post, tree, or other sturdy structure, and then attach the box. the front so you have access to screw or nail the box. If you don’t want to secure the front in place, you can use hanging hardware instead. You can also use hanging hardware that won’t require drilling into the back of the box.