You Can Build a Cheap Custom Copper Pot Stand
Pot racks are not only functional, but have become part of an interior decorator’s toolbox. They make a statement by hanging on the wall or above your stove. They also remind you to wash the bottom of the pots.
The problem is that pot racks are often expensive and difficult to set up, and you need to find one that is perfect for the space you have. But instead of paying extra for one, you can DIY it for next to nothing with little more than a few copper pipes and a drill. This is not a project that requires soldering skills – if you’ve mastered Tinker Toys, you’ve got it.
How to plan a pot shelf
First, measure the space where you want to hang your pot rack, remembering to center it in the available area – you don’t want the pipe to reach the wall or you won’t be able to hang your pots. this. However, you want to secure yourself with stilettos, so finding them is important if you have heavy pots.
Once you’ve measured it, decide if you just need a small square/rectangle or a large post that will need a center post (or two!) – if the post is four feet or more, it should have a support. Create a sketch of your rack, including dimensions. This will tell you how much copper pipe you will need. The pipe is eight feet long, so you will need to cut it off from there.
The sketch will also help you understand what kind of fittings you need – these are the connectors that connect your pipe sections together. You will need elbows and tees , or in rare cases, you may need a cross .
Once you’ve got everything sorted out, it’s time to learn about van hangers.
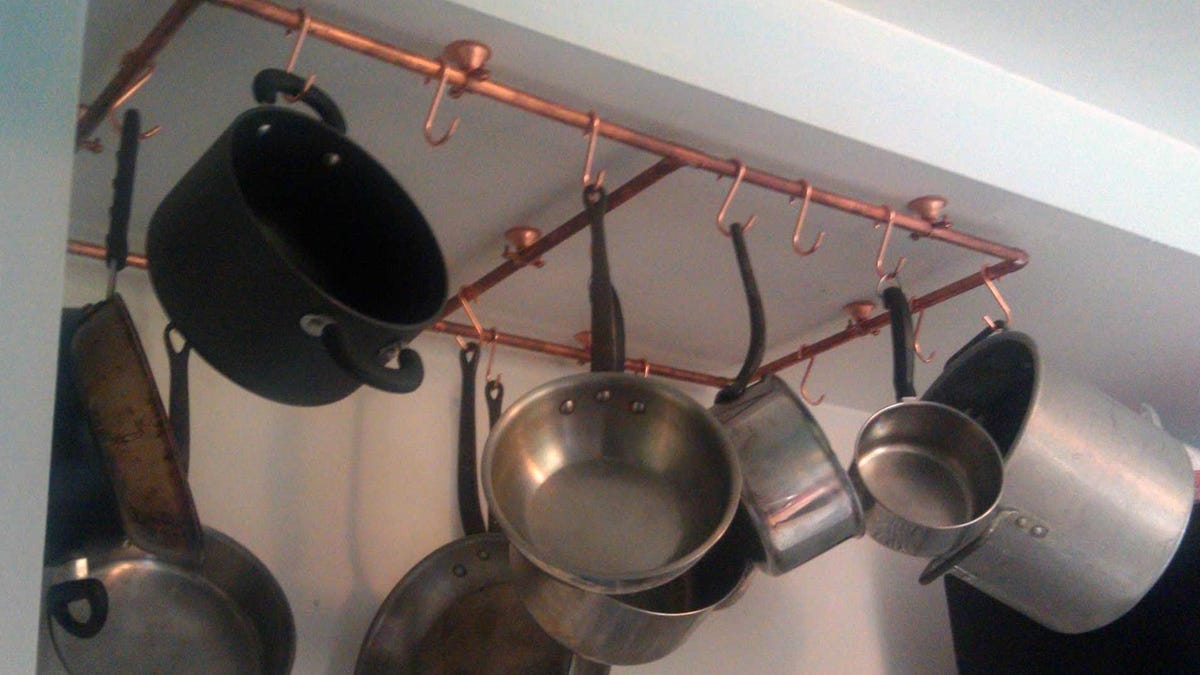
To hang copper pipe from the ceiling, there is a special fitting called a van hanger or bell hanger that wraps around the pipe perfectly and holds it two inches from the ceiling. It even has a decorative cap so it will look complete. You will need a hanger every 18 inches or so. The last step is to attach some copper S-hooks to the rack to hold the pans.
How to assemble a pot stand
Copper pipe can often be cut at the store, but you can also do it at home with this nifty little cutter . You clamp it onto the pipe and twist until the end breaks off. This is deeply satisfying.
Lay out all the cut out parts on the floor in the form of a finished rack. Attach them with the fittings, making sure that the pipe is securely fixed in the fittings. Now it’s time to install the hangers. Ideally you will hang the rack from studs, but this is not always possible, in which case you will need to use anchors to support the rack (you may also need to add additional van hangers to spread the load). Your best bet is to talk to someone at the hardware store about what your ceiling is made of so they can advise you on what will work best.
How to hang a pot holder
That’s where it’s good to have a friend. Install the top half of the hangers first. Then have one person hold the rack in place on the top half of the hangers and have another person secure the rack with the bottom half of the hangers. If you are working alone, you can attach one end of the rack and leave it hanging vertically (not horizontally); then you can just lift the opposite end up and pin it down before moving on to the sides.
Lastly, add the S-hooks and start hanging the pots. Copper may become slightly patina with age, but generally holds up well. I installed mine 13 years ago and the hardest part was finding the right hangers.