When You Might Need a French Gutter (and How to Build One Yourself)
If you want to harness the power of water at will, French drains are the way to go. Whether you have pools of water outside during rain, areas of your garden that get too much water, or a garage or house that floods, a small rock and pipe can solve these problems before they turn into costly repairs.
Any water in your home is obviously too much water. While small amounts can be reduced in, say, a basement with a dehumidifier, if you see any signs of water intrusion on your first floor, you want it dealt with quickly. In the patio, you look for places where water accumulates during a rainstorm. On a paved patio, these areas often become indented, which only exacerbates the problem.
Gardens are probably the easiest to soften and where it’s easiest not to notice that there’s too much water in there. Where your downspouts are empty, this is an obvious place for too much water, but you can choose plants specifically for biological downspouts designed to make the most of the water. If you find that your plants are regularly experiencing swelling (as a result of too much water) or root rot, you need to mitigate the situation.
What are French drains?
Think of French gutters as the other half of a water management system that starts on the roof with gutters that drain rain off the roof and then uses downspouts to channel water away from the house. These drainpipes may lead out into your yard or sometimes connect to a series of pipes that carry water directly to an underground storage or city sewer. French drains are a version of this, underground.
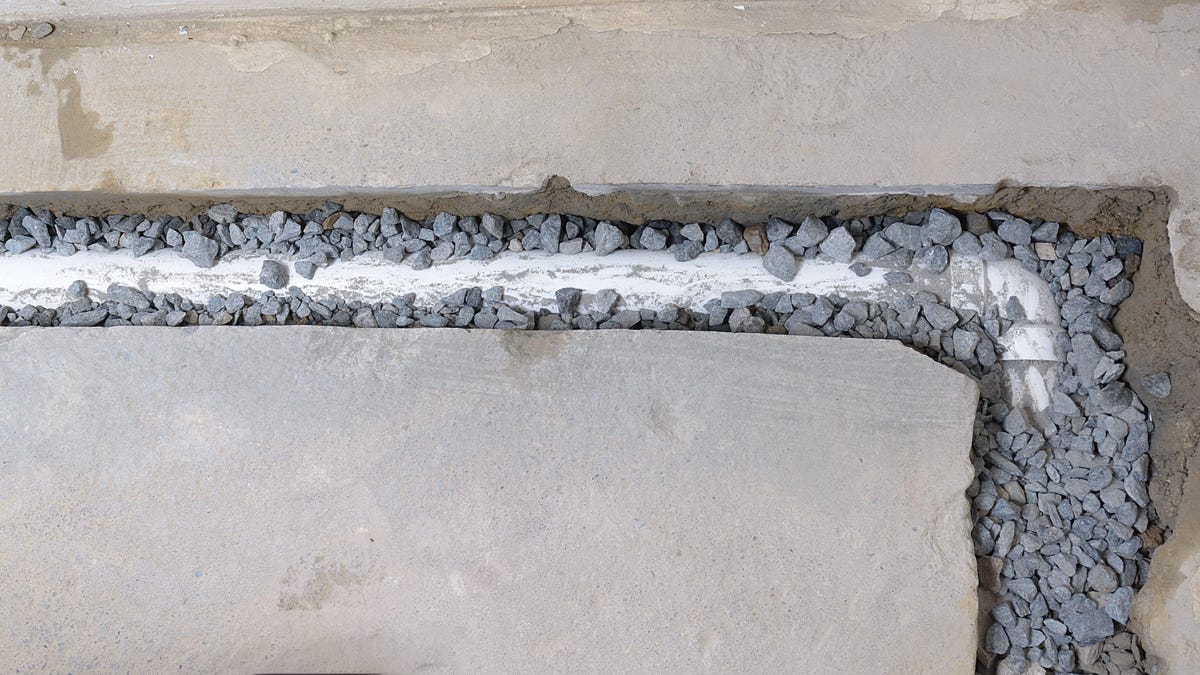
Simply put, French drainage quickly disperses water with a pipe and stone. The trench is created where the water accumulates, and it must exit where you want the water to be distributed. This trench is filled with a drainage pipe with many holes along it, so water can enter and move quickly as it exits, and is then filled with rocks. When water meets the ground, it naturally flows to the place of least resistance, and a rocky trench will offer less resistance than soil, grass, plants, brick, wood, or other material in your home.
As soon as water enters this rocky trench, it enters the pipe through the holes and is quickly distributed along the entire length of the trench and pipe.
French drains make sense around the house, next to the garage, under the patio, or from downpipes. They also allow you to turn water from a nuisance to a friend: you can literally redistribute rainwater in your yard in small or big ways. The French drain really works the same way as a stream: water enters it, collects, and then flows quickly where there is the least resistance.
How to make a French drain
Start by figuring out where water accumulates and where it comes from. We have indicated several sources at the beginning of the article. Then figure out where the water should flow, remembering that it doesn’t have to be a straight line, but it does have to go down the slope, even if only slightly (one inch for every eight feet of ditch). This is what directs the water. Without this slope, the water simply accumulates at the lowest point, with nowhere to go, which can exacerbate your problems.
French drainage can be of any length, but the longer it is, the more effective it is. Once you’ve mapped out your path, you can start digging a trench. The depth and width of the trench will depend on how much water you are redirecting. I recently watched an episode of Homestead Rescue where a raging river was redirected away from the house using what was essentially just a French drain the size of a river.
For most of us, your trench will be 18-24 inches deep and at least twelve inches wide. Since trenching sucks, you should consider renting a trencher from your local hardware store.
Now you’ll need a lot of rock, at least ½ inch in diameter, and you’ll want to flush it out before you put it in the trench. You will use the stone to soften the pipe so that it completely surrounds it. This helps filter the water. Between the rocks and the pipe, the weed tissue will prevent plant roots from growing into the pipe, destroying the drainage. Start by placing gravel an inch or two into the trench along its entire length. Place a weed rag on top of this gravel.
The exciting part starts now. If your trench is mostly a straight line, you will use rigid PVC for this purpose and it has holes already drilled into it; but if you are going to do it yourself, you can also drill holes in the pvc pipe. If your trench is winding, you will choose a downpipe that is corrugated to bend. It has slots that act as holes.
Given a choice, you would probably choose PVC, which has the advantage of being so stable that you can clear blockages with equipment that can damage the thinner drain pipe. In fact, you can even bring the pipe to the surface by attaching a gusset to the end of the PVC so that the end is perpendicular to the ground. When you want to clean it, just open the top of the pipe.
Either way, you’ll lay it on a weed cloth with the holes facing down towards the ground. Wrap the pipe in a seaweed cloth and then cover it with the rest of the rocks until it reaches the level of dirt. If the appearance of the rock bothers you, you can fill it with rocks a few inches below ground level and then cover with earth. You will not see the trench, but you must remember that it is there.