How to Move Seedlings Outdoors Without Killing Them
Welcome to fake spring, a time of great unrest for gardeners across the US. We’ve spent the winter devouring seed catalogs like porn, prowling garden centers like perverts, and now we miss one thing: fifty-degree soil.
I visited my garden center this weekend in need of some fixing and wasn’t shocked to see legions of people dressed as hideous snowmen with carts full of tender tomato and pepper plants. I didn’t even have to listen carefully, I knew what the cashiers were saying: “These plants are still too cold, they need to stay inside at least until Mother’s Day.”
If you’ve ever checked the back of a bag of seeds, they all contain the same phrase: “until the last frost.” Plant six weeks before last frost, seed outdoors after last frost, start indoors 12 weeks before last frost. This makes you think that the last frost is like a tax day, a fixed calendar event. But this is not so, and this, friends, is the bane of existence for every gardener.
Gardening is a gamble because we have to hedge our bets in February, trying to decide when to plant those seeds, almost not knowing when spring will come. It’s late this year almost everywhere. Late spring is a problem because plants continue to grow in greenhouses and there is simply not enough space for them. They’re college graduates, stuck on the perch too long; they have to go somewhere. I come to you with 400 flower seedlings at my feet in my living room and I have nowhere to go. They definitely don’t come out; I learned my lesson last year when I first went to check on the seedlings I left outside and saw a snow cover on April 14th that came without warning.
How to know when it’s time for plants to go outside
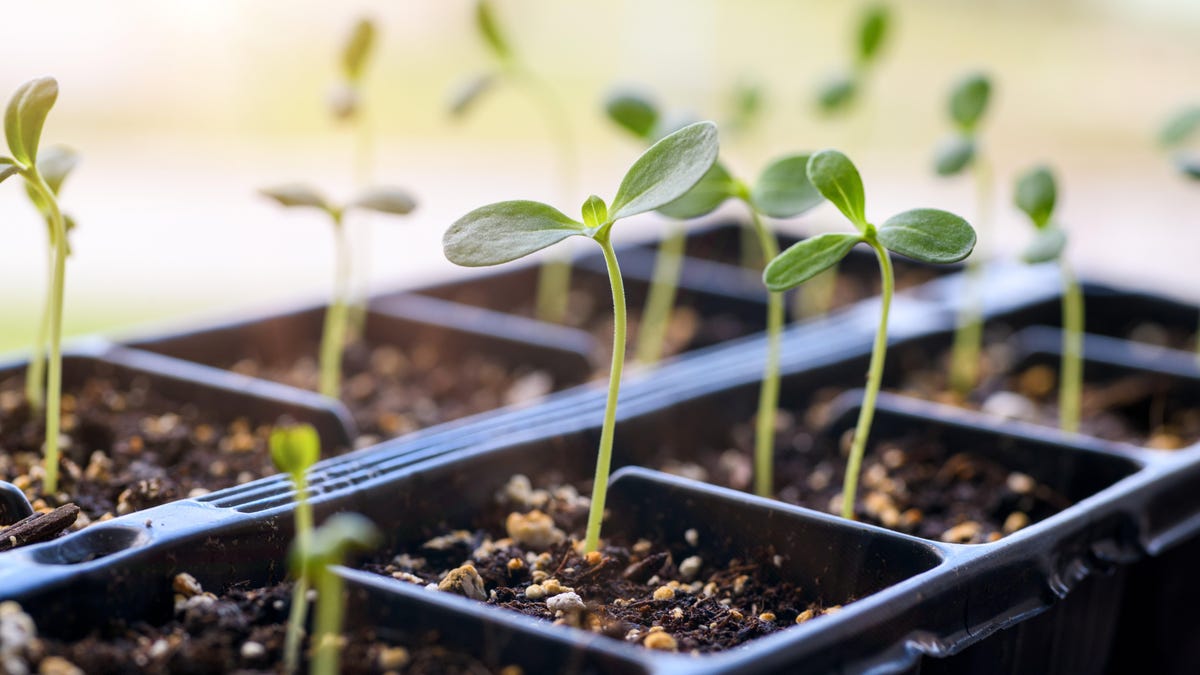
Most of the vegetables and flowers that we associate with summer – tomatoes, peppers, eggplant, zucchini, cucumbers, etc. – are tender. They need warmth to germinate and grow. They cannot survive the cold. Seeds won’t even germinate below 50 degrees and they really need 60 to germinate in any reasonable amount of time. In order for the seedlings to survive outdoors, we need a constant soil temperature in the region of sixty degrees.
A soil thermometer will do. While your local gardening group will be buzzing with news, it’s good to know your own backyard. Different parts of your yard will be ready at different times. Make sure you test the soil at least eight inches deep. When you have at least a week at a soil temperature of 60 degrees, you can probably safely plant these seedlings in the ground.
How to extend the greenhouse season if necessary
The floor in your living room isn’t perfect. Plants need heat, light and water to grow. If you didn’t have enough space inside, it’s time to increase the space in your greenhouse, and the easiest way is the pop-up greenhouse . I prefer those that are close to the ground, because tall and cheap models do not tolerate wind or cold. Pair this pop-up with some agribon and you’ll keep your seedlings cozy outside until you start hardening them off.
I add a few coats of agribbon or row cover to the top of the greenhouse and then a sheet of plastic (painting plastic will do). It acts like a blanket, and depending on the aggregation rating and the number of layers you use, it can actually keep the cold out.
How to harden plants
Your plants’ babies have been raised in an incubator – a cozy heated mat underneath and a warm light overhead in a hot and humid greenhouse with constant water. Even in 60-degree soil, the appearance will be a cruel wake-up call for these Goldilocks babies, and as a result, your plants may go into shock and become stunted, sick, or simply die. We need to make this transition softer. This process is called “hardening” when we slowly begin to introduce your plants to the cruelty of the real world over the course of a week or so.
Even in the cocoon of safety that is your greenhouse or growing medium, you can prepare your plants for the outside environment by making sure the stems are strong. Use fans to circulate the air around the greenhouse easily to increase the strength of the stems. Run your hands over the seedlings often – it’s good for both of you – and tell the seedlings to gain strength. Water constantly, but only as much as needed: The most common problem is overwatering. Bottom watering is ideal, that is, just a small amount of water for seedlings in the bottom pan. We want the seedlings to be as independent as possible. Give the seedlings as much light as possible, as close to the leaves as possible so they don’t become leggy.
Now, if you bought the plants from a garden center, chances are they were hardened off for you. But if the garden center is still keeping them in a greenhouse or sheltering them overnight, you will have to.
Day 1: Excursion
Take the seedling trays outside and place them in a shady area in the middle of the day for a few hours. Shade is really important because resting from the sun gives the plants a chance to recover from the shock. They are not yet designed for millions of kilowatts. Take them out, let them cool for a while in a sheltered shady place, and then bring them back inside and remind them to enjoy these last days.
Day 2: Introduction to the big fireball
Today, place your seeds somewhere outside where they will receive sunlight but not direct exposure for a few hours. They’re still not ready for prime time, but they need more attention than they did yesterday. They then return inside for a night’s sleep.
Day 3: Here comes the sun
Today is the day! We’re going out in the sun, baby, for hours. Make sure your seedlings are hydrated before they go outside, but the sun hat is off; it’s time to get some vitamin D. After three to four hours, bring them back.
Day 4: Sun out, buds open
Back they go, and in full exposure; today let’s leave them for five or six hours before putting them back.
Day 5: Summer is over at school
This is the nursery’s first full day off, so first move the seedlings out and don’t bring them back in until the sun has set. Put them to bed for the last time, read them a bedtime story about the little tomato that could, and say goodnight.
Day 6: Hey-ho, hey-ho…
Take one last shot with your little ones because they are being pushed out of the nest this morning. Take them outside, check at sunset, and then leave them outside overnight. Creatures roam the garden at night, be it slugs, rabbits, squirrels or voles, so pick them up if you can.
Day 7: Independence Day
Everything falls apart today when you plant your children in the ground. Ideally, you should plant them in the late afternoon so they can recover from their injury without the scorching sun overhead. Planting in the morning or mid-afternoon means they will be in full sun when they are most stressed, which is not ideal.