It’s Time to Start Growing Your Own Seedlings
Growing your own food is supposed to be a hedge against inflation, but prices are rising at the garden center too. The price of vegetables and flowers has risen by almost 40% in many places I have visited across the country this spring. When six packs started costing over $7, I knew it was time to increase my home growing volumes.
Fortunately, I have spent years setting up a seedling nursery at home and I am happy to share this knowledge with you. Here’s a cheap way to take advantage of my experience and grow your own tiny nursery.
Pick your seeds (and don’t overdo it)
First, you have to find the seeds – and yes, inflation will hit them too. Since you’re starting a few seeds and not a farm, it’s best to just visit a hardware center or grocery store and pick up a few bags there. Start with the basics: tomatoes, peppers, and basil. You’re going to spend $2-$5 for a pack of seeds, depending on where you buy them, but Home Depot and Supermarket remain the cheapest I’ve seen this season. Since you won’t need the whole package, you can definitely go with a friend. All three of the truths I noted will last for several years, so place your leftovers in a zip lock away from the sun and hang on to them.
There may also be a seed library or seed exchange ( local ornational ) in your area, or maybe you have a neighbor who is enthusiastic about helping aspiring gardeners. Ask on your local garden Facebook group , who will also be your support group throughout the journey. (Gardeners are amazingly generous souls.)
You can read a lot about the types of tomatoes (sliced, pasta, cherry) and how to grow them: (determinant and non-determinant), but let’s assume that you already know what you like. Don’t go overboard with your choice, because the immense pride you feel when they sprout will overshadow any hesitation about what material you’ve chosen. (Same for pepper and basil.)
Gather your equipment
You’ll need a few leftover plastic strawberry containers, but any plastic container at least three inches deep and with some drainage at the bottom will actually work. You can of course buy six packs or four inch pots ; you might even have something from last year. Your local garden center may keep them and want to give some to you, and your neighbors probably have some stock, so take advantage of Buy Nothing and Next Door .
You will need a seed starter mix , which you will need to purchase. Seedlings require a special mix with excellent drainage but no nutrients (weird, I know). Buy a small bag from your local nursery; you won’t need much, but it should be a seed starter mix, not a potting mix.
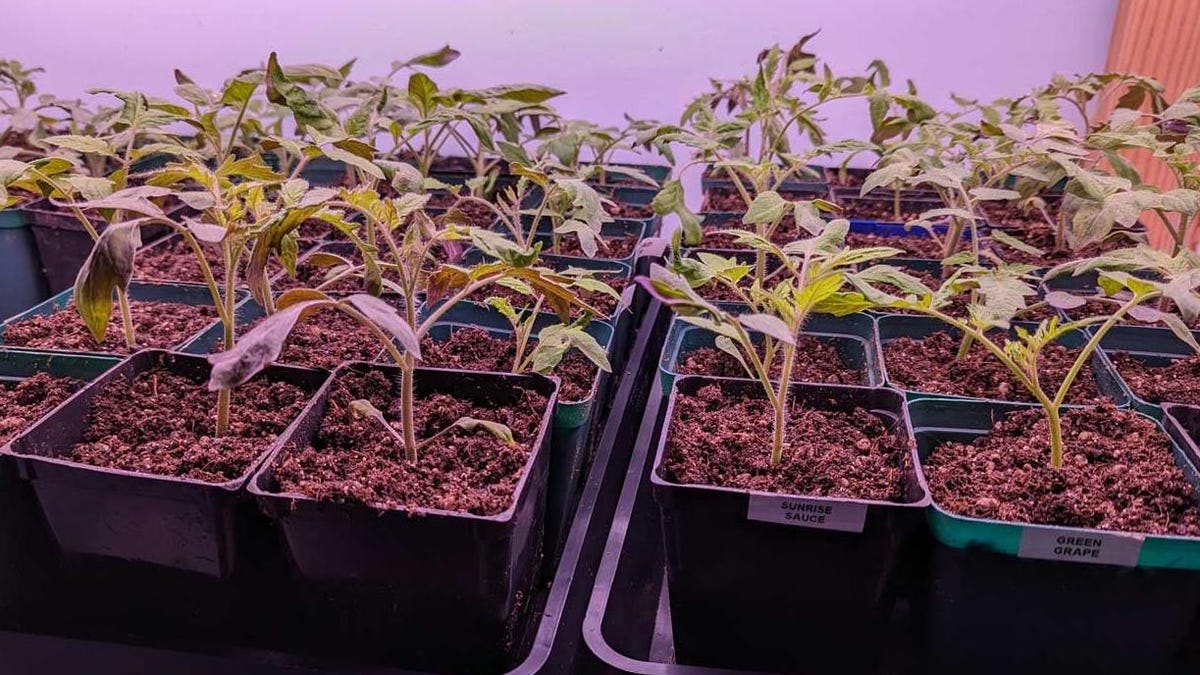
You will need a tray. The photo shows tray 1020, which you saw in your nursery. It will hold your seedlings and help you water them from below. Ask at the grocery store’s garden center if you can get one of these, as they often give them out, and of course , they can be bought online as well . Since you’ll only need one, if you can’t find one, use a rimmed cookie cutter or a jelly roll pan. This will work just fine.
Finally, you need the sun. Seedlings need a lot of light, and the most common mistake people make is not lighting enough seeds. We’ll get to that.
Where to begin
First, fill the containers with wet seedling mix. Toss some into a mixing bowl and rinse just enough so that it forms clumps when squeezed. Once it’s consistently hydrated, pack it in a container and tap it a few times. You want it to be full, but don’t package it like it’s brown sugar and you’re making cookies.
You will now read the back of the seed bag, which almost always tells you how deep to plant the seeds. In the case of peppers, tomatoes, and basil, the answer is 1/4 of the depth. I use a pencil, stick it into the soil every 2 inches and drop one seed. Plant twice as many seeds as you think you’ll need plants. It’s good to have a spare in case things go awry, and if not, you’ll have something to start handing out.
Now we are going to put the seedling containers in the tray. If you are using a baking sheet, line it generously with plastic wrap so the containers sit on the plastic and not bare metal. Loosely cover the container with plastic. Finally, add ½ cup of water to the pan instead of pouring it into the soil. This is bottom watering.
So now we need to talk about the sun. The sun provides plants with two things: light and warmth. Since we’re inside, we need to fake both. If you can keep the seedlings in a warm enough room (over 70 degrees), you don’t need to do more. If not, place a heating pad under the seedlings with a folded towel between the heating pad and the tray. You don’t want to bake your seedlings, just warm them up.
Now let’s talk about light: your seedlings need a lot of light, and it’s best if the light source is directly above them. Hanging them by the window is not enough. The best way is to simply get some decent grow lights that are cheaper than before thanks to LED technology. However, since we are just getting started, I will recommend that you use one of the lamps you have and replace it with a grow lamp . Even if you never grow a shrub again, it will be good for your mental health to sit next to it in the winter. Curve this lamp so that the light falls directly on your seedlings. Turn it on first thing in the morning, turn it off when you go to bed. You can leave it on 24/7 and it won’t be a problem.
When you see condensation on the plastic wrap, it’s a great sign that your mini greenhouse is working. Thanks to this condensation, you will only need to add water to the tray every other day, and only ½ inch or so. The holes in the bottom of the containers will allow the soil to absorb the water that the plants actually use. After two weeks, you will begin to notice how your babies appear. Once 50% of the tray has germinated, remove the plastic and turn off the heating pad. It’s okay if they don’t all sprout – that’s why we planted more – and some of them will continue to sprout even after the plastic comes off.
Turn on a fan in the room, or simply run your clean hands over the seedlings once they are one inch high, as this will strengthen the stems. Once the plastic is removed, water every morning, remembering to add only ⅓ inch or so of water. The soil should remain slightly damp, but not wet. Keep this light close to the seedling and let it grow.
At this point, you can add some fertilizer to the water, but you’ll be fine without it. If you decide you need it, add a small amount of fish manure to the watering can.
Your seedlings are fine in their container until it’s time to plant them outside, but if they get crowded, you can transplant them into larger containers. Again, search the Internet for four or eight inch pots, as these are often overlooked by gardeners. When you plant, do it in the same seed starter mix.
Your gardening friends on social media will be a huge help on your seedling adventure – this is a great time to get involved with your local gardening community online or join #gardentok. (What’s the point of all this if you don’t publish it in the “gram”?)
And finally, and most importantly, when you find yourself talking to your plants—because you will experience sheer joy every time you notice sprouts coming out of the soil—don’t wonder. The world is a garbage fire. Take a whim where you can find it.