How to Build the Perfect Gingerbread House
I am not an architect. I don’t know how to understand blueprints, make things stable, or even really understand what a “model” does. I am a competent cook, but a poor baker. The two flaky cakes I tried to make in my life started to sag like a tower in Pisa a few hours after they finished. However, I am extremely stubborn and very energetic. I saw gingerbread houses all over the place all the time, and as someone who loves good cookies and a bunch of gummy candies, I reached out to some experts to give you (me) tips that don’t quite fit the recipes you read online (and there are hundreds of them). ).
Before reading any further, it’s important to know that you are almost certainly already lagging behind in the steps required to create a pristine gingerbread house. You will also almost certainly need a few days to get ready. This is your new life. Julia Moschin, a staff reporter for The New York Times and author of their guide to gingerbread, says the biggest mistake new bakers make is “not getting started early enough.” This is not what you want to start Christmas Eve with. “
It will take you days for your sanity to build your house. You are a cookie architect, a holiday cheer that defies physics. It’s time to become a Christmas elf:
Establish a good foundation
Gingerbread houses are tough – and nerve-wracking – to move around, so choose a stable platform that can be easily moved, or set directly on top of your display. At the more extreme end of the spectrum, Fred Johnson, executive chef of the US House of Representatives, made a six-foot-long, 10-inch-high gingerbread this year depicting the US Capitol . To maintain stability, Johnson built his massive structure on a conference table, but anything stable and flat will do for your smaller scale creation. I used a metal baking sheet, but a sturdy cutting board will work.
Even if you build a good foundation, you may need reinforcements. This is a secret that all professional gingerbread houses know that we, simple beginners, do not have : your cookies should not contain themselves! Johnson, for example, used a timber support structure to help his gingerbread house stand. If you want to cheat by putting a bunch of canned food in your home to support that sloping wall, that’s okay. And if you want it to remain edible, you can even use crispy rice treats as a stabilizer . You can use whatever you want. Johnson built a timber frame! Nobody needs to know. The cookie covers all the flaws.
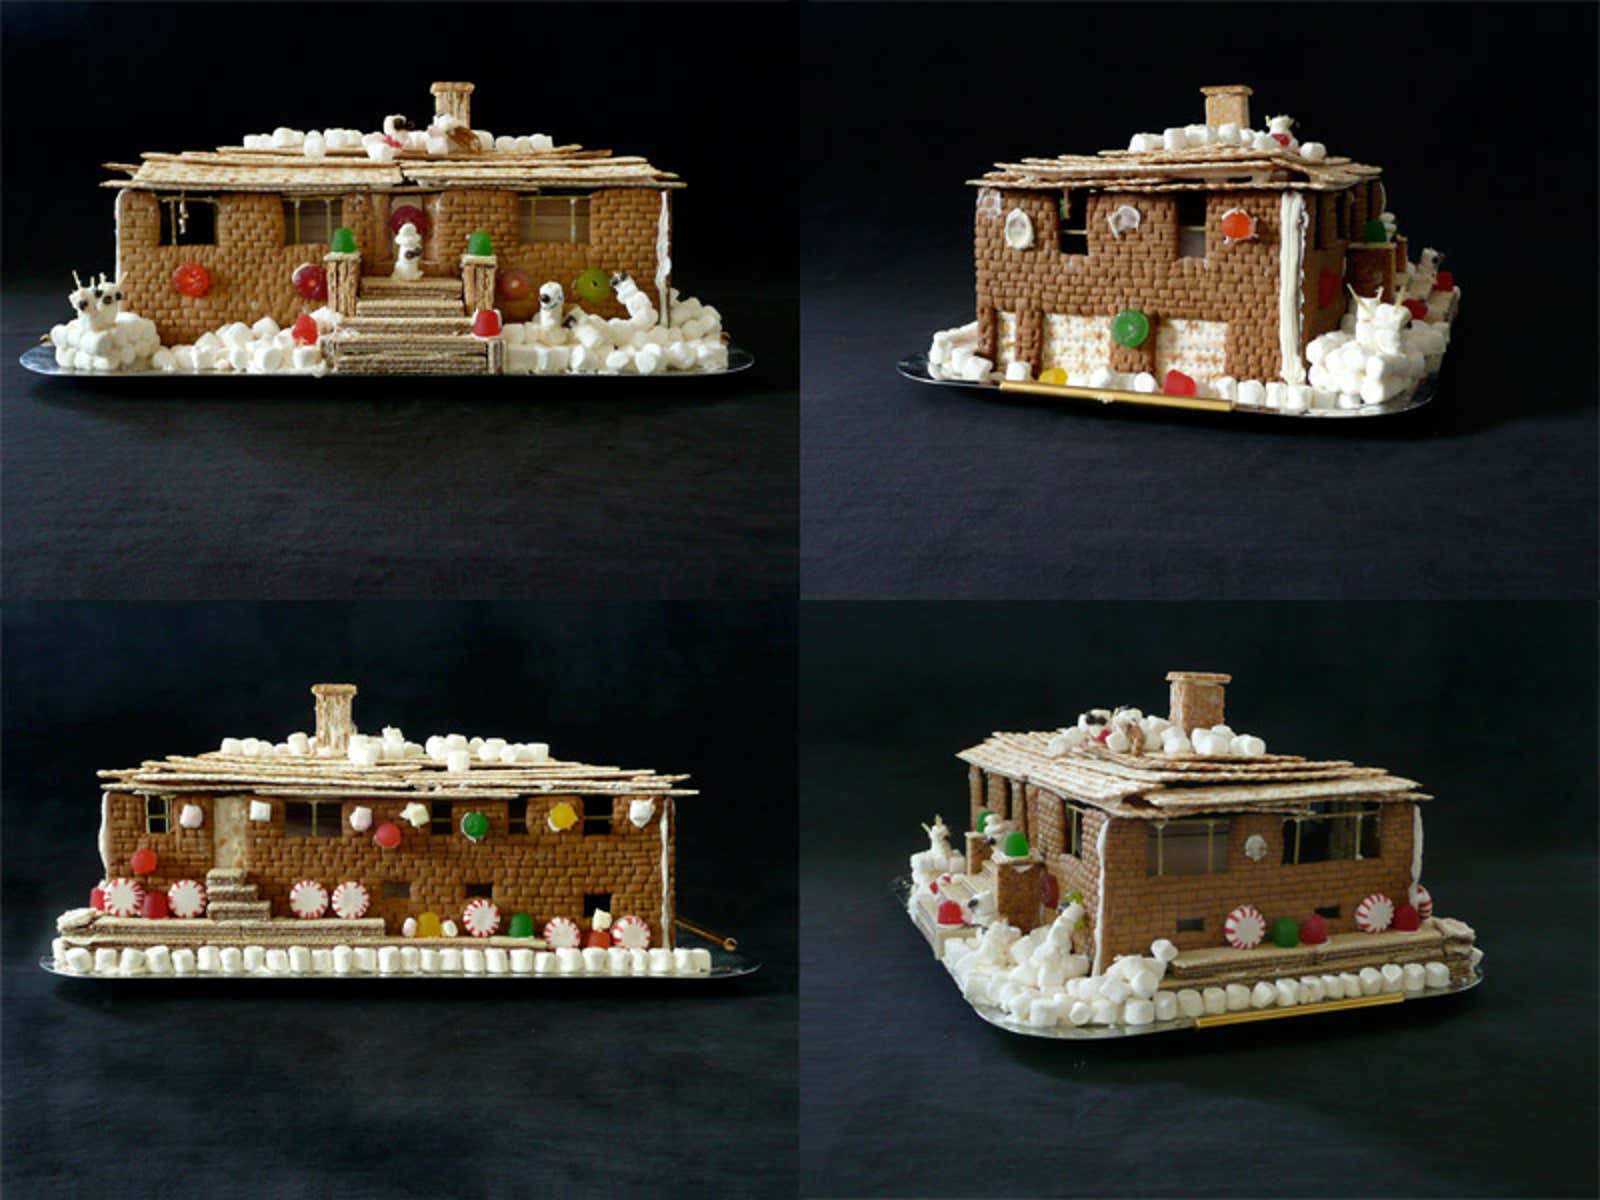
I built my cookie house (and little dog house) on a tin foil lined baking sheet to make cleaning easier. I built my house on one square foot of countertop that my kitchen has and filled my house with cans of black Goya beans (which you can see through the windows if you look closely).
Choose the best plan
“I think a simple house with straight sides is best for a beginner,” says Colette Peters of Colette’s Cakes . “You can definitely come up with this with candy, cookies and other treats.”
Stella Parks (aka Bravetart) made a very clear video for Serious Eats on how to roll out dough, make the most of your space, and hammer in the pieces before baking them. But here are the basics you need to know:
Roll out the dough to approximately 1/8 inch thick. If you have a fancy rolling pin, you can use attachments or just point your eye at it; everything is fine. I rolled the dough out on my only counter and then carefully moved it (you could say gently) onto a baking sheet lined with parchment paper for easy retrieval later. Then I put my stencil on the cookie and ran my knife over it so I could cut it out easily later. For clarity, I also tried to cut out some of my pieces and bake them separately, but found that they spread more and also curled up somehow, which must have been the result of my mistake. This was easy enough to fix. For one wall, I could easily crop a half-inch (and then also crop its compatriot on the other side of the house). But I just covered one curled cookie with icing and haven’t told anyone until now.
“I used a pizza knife halfway through [the whole] baking process to clean the stencil because it builds up a little and it also gives a nice clean edge,” Johnson suggests. (That would be good advice for me, but I forgot.)
For Johnson’s gingerbread house, he used the Capitol plan, scaled it down, and then printed the pieces and put them together on a conference table. In my opinion, this is impossible, and this is more than what is needed for a novice builder. But it’s good to have a stencil to work with. You can make one out of paper and tape it neatly to make sure everything is the correct size, then take it apart and use these sheets to trace around your pieces. Two experts I spoke with recommended staying away from curved walls (who are you, Corbusier?) And very narrow pieces that break in half when you try to put them together. In short: keep the design simple.
I chose a super-classic house shape: two pentagons in the front and back, two rectangular side walls and two slightly larger rectangular roof elements. I also made smaller ones for my kennel.
Choose materials and recipe wisely
Once you know what your house, sleigh, or tree will look like and make traceable paper stencils, it’s time to make gingerbread. Choose a recipe that matches how much effort you are willing to put in. For example, a New York Times recipe takes at least five days to get it right. Some only need noon . Most people want you to at least let it dry for a few hours. I gave myself 18 hours to make the cookie dough and bake it, then take a break before doing anything else. At the very least, you’ll need a full day of attention.
If you are working quickly (during the day), try baking the gingerbread over low heat and slower at around 250 ° C for longer to keep the cookies drier and more stable. I baked my rather large cookie walls at 250 ° C for 30 minutes and it worked. If you bake at a higher temperature for a shorter period of time, your gingerbread will be softer, tastier, but harder to work with. Anyone who builds a house in five days is looking for incredibly dry gingerbread. If your cookie is dry enough , you can just cheat (as mentioned above) and spend less time waiting.
Another important thing to keep in mind when choosing materials: you should. Use. Royal. Icing. This is non-negotiable. “It’s the only thing that is strong enough to keep the house stable,” Moskin says. “And since it looks like snow, you can always add more!” Don’t use creamy or that delicious icing in the jar. It will not harden, and while it will still taste delicious, your home will not be glued together properly.
I didn’t even do my royal icing very well and it wasn’t glossy but it held up and that’s the whole point of the Christmas spirit.
Some design notes
Just as it is imperative to use royal icing – and no other kind of icing! – As a glue for your home, it’s also important to let this (royal) glaze dry before you start the rest of the decorations. Start too early and your house will fall apart when you start pushing candy into it.
As for what you should use for this decoration: “Most beginners should start with the candy,” says Peters, rather than the more complex icing. The royal icing you already mixed to hold your home together will also help stick candy to your home. I had particular success with red hot, mint, spiced marmalade and white chocolate Riesa cups. Very festive.
If you want to make things more elegant, you can cut out a window in the wall before the dough goes into the oven, and place some hard candy inside so that when you bake it, it turns into a stained glass window you can eat. Moskin recommends Merry Ranches. I didn’t try it myself, because I was afraid.
“I like to put a snow-covered pile of logs on the side of the house,” adds Moskin. “They’re just pretzel rods glued together with royal icing, but it looks so real.” I did it. It was easy and I am impressed with myself. I also used it before any photographs were taken.
Cheat option
Until this year, I had never made a gingerbread house from scratch. I am not from a family of bakers, and it seemed to me that I had a lot of work, which, of course, it was. As a child, we did decorate gingerbread houses, but from simpler ready-made options. If the steps above seem more complicated than you might imagine, there is currently a $ 10 kit available from Target that comes with pre-baked cookies, and I also noticed a fully assembled under $ 20 gingerbread house at Whole. Food.
A word of caution, though: the set is fun for fifteen minutes, but it mostly depends on the finer points of the frosting and good design flair. By comparison, my gingerbread house isn’t the most beautiful thing in the world, but I did it all. I made it incredibly simple and didn’t do anything risky, and in the end my gingerbread house is amazing, thank you. The uncertainty about whether it would fall kept me on my toes for several hours as it dried up, and while I waited, there were a lot of extra gingerbread left over.
It took a long time, but it did more good when, in the end, my gingerbread house got up, which is more than I could ask for. Thanks to Royal Icing. Congratulations, we are all architects now!